
Few backyard features hold people outside after dinner the way a fire pit does. It gives people a reason to stay out, a place to face each other instead of a screen, and a warm center that makes a plain yard feel like a room. The best fire pit setups are not the most expensive ones. They are the ones where the seating feels right, the smoke stays out of faces, and nobody has to think about safety while they are trying to relax.
Every choice below is judged by how it feels to sit around the fire with other people, from choosing wood or gas to placing the pit, arranging chairs, styling the area, and using it through the seasons.
What Makes a Fire Pit Gathering Work
A fire pit gathering works when three things line up: warmth, conversation, and ease. Warmth matters because people will not linger if they are cold on one side and hot on the other. Conversation matters because a circle of chairs facing a fire invites talk in a way that a row of chairs facing a fence never does. Ease matters because a setup that needs constant tending, awkward reaching, or frequent trips back to the house will empty out fast.
Start with how you actually gather. A couple who wants quiet evenings needs a small pit and two deep chairs. A family with teenagers needs room for six or eight, plus space for someone to stand, toast marshmallows, and move without stepping over legs. A household that hosts often needs a layout that can flex, with a few movable chairs and a bench that can hold extra guests when the group grows.
The sound of a wood fire adds a lot to the mood. The crackle, the smell of dry wood, and the way the light moves across faces make the evening feel slower and more present. Gas is quiet, clean, and ready in seconds, and it suits hosts who want the glow without the smoke and ash. Neither choice is wrong. The right one depends on how much work you want to do before and after the fire.
Light matters as much as heat. A fire gives off a warm, low light that flatters everyone and softens the edges of a yard at dusk. That glow is why people lean in, talk longer, and forget to check the time. A few low string lights or lanterns around the edge of the seating area help guests find their chairs and their drinks without washing out the firelight. Keep extra lighting dim and warm, around 2700K, so it supports the fire instead of competing with it.
Choose the Right Type of Fire Pit
The type you choose shapes everything else: the fuel you buy, the surface you need, the clearance you must keep, and how often you will use it. Decide on fuel first, then on form.
Wood-Burning Fire Pits
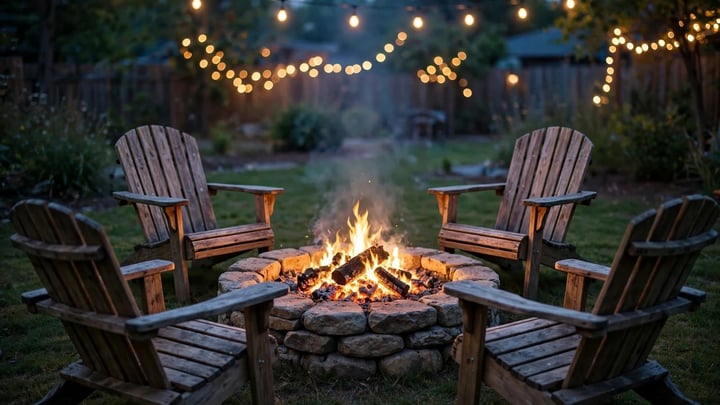
A wood-burning pit gives the strongest sensory experience. The smell of seasoned hardwood, the sound of a log settling, and the bright, moving flame are hard to match. Wood pits are often praised for strong heat for the money, though how much heat you actually feel depends on the pit size, the wood, and the wind. They also work well for cooking, from marshmallows to foil-wrapped vegetables and skewers.
Wood needs more care. You need dry, seasoned wood stored under cover, a spark screen for many setups, and time to let the fire burn down safely at the end of the night. Ash has to be removed and disposed of once it is fully cold. Smoke follows the wind, so seating placement matters more with wood than with gas. In dry regions, local burn bans can rule out wood fires for weeks at a time, so check local rules before you plan a season around wood alone.
A round steel bowl is the simplest entry point. It is portable, easy to store, and easy to replace. A stone or brick pit feels more permanent and anchors a patio design, but it needs a level, noncombustible base and a liner that can handle high heat. A chiminea directs heat and smoke upward through a narrow neck, which can suit a small patio, but it warms a smaller circle of people than an open bowl does.
Gas Fire Pits: Propane and Natural Gas

A gas pit trades the crackle of wood for control. Turn a knob, and the flame appears. Turn it again, and the evening ends cleanly, with no embers to watch. That control makes gas a strong choice for families with small children, for households in areas with frequent burn bans, and for anyone who wants to use the fire on a weeknight without a long setup.
Propane pits use a refillable tank, often hidden inside the base of a fire table. They are portable in the sense that you can move the table, but the tank adds weight and needs refilling. Natural gas pits connect to a home gas line, so there is no tank to refill, but installation needs a licensed professional and a gas line run, which adds cost and limits where the pit can sit. Gas gives steady, predictable heat, and many models list output in British thermal units, so you can compare models on paper before you buy.
Gas flames look different from wood flames. They are lower, steadier, and less bright, and they do not throw sparks. Some people miss the wood smell and the sound. Others prefer the clean air and the fact that clothes do not come back smelling of smoke. If your group includes people who are sensitive to smoke, gas is the kinder choice.
Which Type Suits Your Gatherings?
| Type | Best for | Main trade-off |
|---|---|---|
| Wood-burning bowl or ring | Campfire feel, cooking, larger groups | Smoke, sparks, ash, and storage |
| Propane fire table | Easy weeknight use, dining, smoke-sensitive guests | Tank refills and lower flame drama |
| Natural gas built-in pit | Frequent use, no refills, clean finish | Higher install cost and fixed location |
| Chiminea | Small patios, directed heat, tidy footprint | Warms a smaller circle |
| Portable steel bowl | Renters, small budgets, flexible placement | Less heat and a shorter lifespan |
Size and Shape: Getting the Proportions Right
A fire pit that is too large dominates a small yard and pushes people too far apart to talk easily. A pit that is too small leaves the outer chairs cold and makes the group crowd inward. As a planning guide for most backyard gatherings, a round pit with an inner diameter of 30 to 42 inches (76 to 107 cm) works well for four to six people. Larger pits, around 48 inches (122 cm) across, can seat eight, but they need a bigger patio and a stronger heat output to keep the outer ring comfortable.
Round pits suit conversation best because everyone faces the center and no one sits at a far end. Square and rectangular pits suit long patios and linear seating, and they pair well with a bench on one side and chairs on the other. A rectangular fire table can also line up with a rectangular patio, which keeps walkways even on both sides.
Leave a clear ring around the pit for feet, drinks, and movement. A common planning range from seating guides is 3 to 4 feet (91 to 122 cm) from the edge of the pit to the front of the chairs, with more distance for wood fires. That range is a starting point, not a code rule, and it is listed in the checklist at the end of this article as a planning range to verify against the specific product manual. The product manual for your pit is the document that governs its clearances, and it should be read before the first fire.
Where to Put a Fire Pit
Placement decides safety, smoke, and comfort all at once. A beautiful pit in the wrong spot will be used less and worried over more. Choose the spot before you choose the furniture.
Safety Setbacks and Local Rules
Fire safety guidance is widely cited, but the numbers differ between sources, and local law is the rule that counts. The National Fire Protection Association (NFPA) is commonly cited as recommending at least 10 feet (3.0 m) of clearance between a portable outdoor fire pit and a house, garage, shed, wooden deck, fence, or other combustible structure, according to secondary guides summarizing NFPA guidance, including EngineerFix in 2026. Many of those same guides recommend 15 to 25 feet (4.6 to 7.6 m) for wood-burning pits, because embers can travel on the wind. Those figures are commonly cited guidance, not a permit and not a code. Your city, county, or homeowners association may require more distance, may set a different distance from a property line, or may ban open burning during dry periods.
Check three things before you build or buy: the local fire code or fire marshal guidance, any homeowners association rules, and any burn-ban or air-quality rules for your area. A gas pit is often allowed where wood is restricted during a burn ban, because it produces a controlled flame with no flying embers, but that exemption is not universal, so confirm it locally. Keep the pit away from low branches, eaves, pergolas, and overhead wires, and keep a clear vertical space above the flame. Commonly cited overhead guidance ranges from 10 to 21 feet (3.0 to 6.4 m), which shows why a single number is not enough on its own. Look up, measure, and follow the stricter of the local rule and the product manual.
A common mistake is to place a pit where it looks best in a photo and only later discover that the prevailing wind blows smoke straight into the chairs. Watch the wind over several evenings before you commit to a permanent spot. A portable pit lets you test two or three positions in a single season, which is a practical advantage for a first fire pit.
The Ground Under the Pit

A fire pit belongs on a level, noncombustible surface: concrete, stone pavers, brick, or compacted gravel. Grass can scorch and dry out, and a wooden deck needs a heat-resistant barrier and a pit rated for that use, if it is allowed at all. Many product manuals prohibit placing a wood-burning pit directly on a deck. Do not assume a mat makes any pit deck-safe. Read the manual and the local code first.
Gravel is forgiving and drains well, and it gives a relaxed, informal feel that suits a backyard gathering. Pavers give a cleaner edge and a firmer surface for chair legs, which matters for older guests and for anyone using a wheelchair or a walker. A concrete pad is the most durable option and the easiest to sweep, but it can feel hard and plain unless it is softened with planting or a low wall around the edge. Whatever surface you choose, keep it level. A tilted pit is a safety problem, and wobbly chairs on uneven ground will end an evening early.
Seating That Invites People to Stay
Chairs decide how long a gathering lasts. A beautiful pit with hard, tippy, or too-low chairs will sit empty. Comfortable seating with room to move, a place to set a drink, and a blanket within reach will keep people outside long after the sun goes down.
The Circle Layout
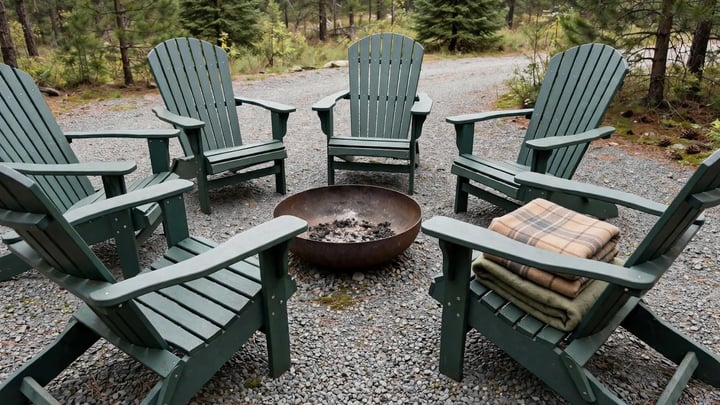
A full circle of chairs around a round pit is the classic layout for a reason. Everyone can see everyone else, no one has their back to the fire, and the group feels equal. Leave one gap in the circle as an entry point, so people can step in without climbing over chairs or squeezing past the fire. That gap also gives the host a clear path to tend the fire and to carry food out from the house.
For a 15 foot (4.6 m) diameter seating area, six chairs fit comfortably with room to walk behind them. For a smaller yard, four chairs and a bench can seat the same number of people in less space, because a bench tucks closer to the pit and holds two or three people without the gaps that chairs need. A curved seat wall, built from stone or block with a smooth cap, can serve as permanent overflow seating and as a place to set plates and drinks. A cap about 12 inches (30 cm) deep gives enough room for elbows and glasses without pushing people too far from the heat.
Styling the Fire Pit Area
Styling a fire pit area is about texture, light, and a few honest materials, not about filling every surface. The fire is already the focal point. The rest of the design should support it and then get out of the way.
Stone, brick, gravel, and wood are the materials that look most at home around a fire. A stone pit with a gravel base and wooden chairs feels grounded and calm. A black steel bowl on a concrete pad with slim metal chairs feels sharper and more modern. Either direction can work, as long as the materials repeat elsewhere in the yard. A pit that uses the same stone as a garden wall or the same wood as a deck will look like it belongs, while a pit in a completely unrelated material can look dropped in by accident.
Lighting should stay low and warm. String lights hung from a fence or a pair of posts give a soft glow that helps guests move safely without overpowering the fire. Solar path lights along the walk from the house to the pit are practical, and lanterns on the ground or on a side table add a second layer of light at seated eye level. Avoid bright white floodlights over the seating area. They flatten faces, kill the mood, and make the fire look small by comparison.
Using a Fire Pit Through the Seasons

A fire pit earns its cost when it is used beyond summer. With the right fuel and a few comforts, it can stretch the outdoor season by weeks on either side, and in mild climates it can work year-round.
Spring and autumn are the best seasons for a fire pit. Cool air, early dark, blankets, and hot drinks make the fire feel like a reward after a day outside. Summer calls for a smaller fire or a gas pit on a low setting, so the flame gives light without heavy heat. In mild climates a fire pit can work through winter with blankets and a wind break. In cold regions, keep winter fires short, sit close, and use a gas pit that reaches full heat quickly and turns off the moment the group heads inside. Store cushions indoors between winter uses, and keep the pit covered when it is not lit.
What a Fire Pit Costs
Cost is where many fire pit plans stall, because the range is so wide. A clear cost frame helps you decide whether to start portable or go straight to a built-in design.
HomeGuide, in its 2026 fire pit cost guide, reports that building a custom fire pit costs $325 to $2,000 on average, that prefab fire pit prices run $75 to $500, that a stone patio with a fire pit costs $2,200 to $6,800, and that a gas fire pit installation costs $3,500 to $8,000 for labor and materials. Lawn Love, in its 2026 guide, reports a national average of $830, with most homeowners spending between $250 and $2,200, including materials and labor. Those two sources report different averages, because they measure different mixes of portable and built-in projects. They agree on the shape of the range: portable pits cost a few hundred dollars, built-in wood pits cost a few thousand, and built-in gas pits cost the most.
Use that range as a planning frame, not as a quote. Costs vary by region and material, and a gas line, a patio, a seat wall, or a permit can add a large amount to a built-in project. A portable propane table can be a complete setup for the price of a single built-in feature, and it lets you test the habit before you commit. A built-in stone pit with a paver patio and a seat wall is a landscape project, and it should be priced as one, with quotes from local installers and a clear scope for the base, the drainage, and the gas work if any.
Care, Storage, and Keeping the Area Safe
A fire pit that is easy to care for gets used more. A pit that is hard to clean, hard to cover, or hard to light will be left alone after the first few weeks.
Keep a safety kit within reach but out of the fire ring: a bucket of sand or a garden hose, a fire extinguisher rated for outdoor use, and a pair of heat-resistant gloves. Teach everyone in the household where the kit is and how to use it before the first fire, not during an emergency. Never leave a fire unattended, never use gasoline or lighter fluid to start a wood fire, and never burn treated wood, painted wood, or household trash in a fire pit. Those materials can release harmful fumes and can damage the pit.
Care follows the seasons. A pit that is cleaned and checked at each turn stays ready, and the first fire of spring becomes a pleasure instead of a repair job.
Start the season with a full inspection. Look for cracks in stone or brick, rust spots on a steel bowl, loose joints on a gas table, and soot baked onto the burner or the inside of the bowl. A stiff brush and warm soapy water will clear most soot and ash. Let the pit dry fully before the first fire, because a damp bowl steams and a damp burner sputters. Check that any drain hole in a steel bowl is clear, since standing water is what starts rust.
Steel and stone ask for different care through the summer. A steel bowl that sits uncovered in rain will rust first at the rim and the base, and a thin coat of high-heat paint at the start of the season slows that down. Ash left sitting in a stone pit holds moisture against the stone, so scoop it out once it is fully cold after every few uses. Look at the hose and connections for wear, cracking, or loose fittings before the first lighting of the season, and test them with soapy water. Bubbles at a joint mean gas is escaping, and that connection needs attention before the pit is lit. That bubble test is commonly cited guidance, and the exact procedure should be checked against the product manual.
Wood storage decides how much you enjoy a wood fire. Seasoned hardwood kept off the ground, with a cover over the top and open sides for airflow, stays dry and lights cleanly, while wood stacked flat on damp soil smokes more and throws less heat. A cover earns its keep between uses, but only if it breathes. A fitted, water-resistant cover keeps rain out of the bowl, while a tight plastic sheet traps moisture underneath and encourages rust on steel and mildew on nearby cushions. Store cushions and blankets indoors between uses.
There is a particular pleasure in the first fire of spring, after a winter of looking at a covered pit through a window. The smell of dry wood and the warmth reaching across the chairs make the yard feel alive again. That feeling is what the maintenance is for. A pit that is clean, dry, and ready turns a quiet evening into a gathering with almost no effort at all.
A Fire Pit That Fits Your Yard
The right fire pit is not the largest one or the most photographed one. It is the one that fits your yard, your budget, and the way your household actually gathers. A small round bowl with four good chairs on a gravel base can create a better evening than a large built-in pit with nowhere comfortable to sit. A gas table that lights in seconds can be used twice a week, while a wood pit that needs an hour of prep might be used twice a summer.
The order matters more than the budget. Where the pit sits and how safe it is comes first, then fuel, then seating. If you are unsure, try a portable pit for a season before you commit. It will show you where the smoke goes and which chairs people actually choose. Then add light, blankets, and a place for drinks, and keep the styling simple. When the chairs are comfortable, the smoke stays clear, and the light is warm and low, people will stay. That is the whole point of a fire pit, and it is also the test that tells you whether the setup is working.
Planning a wider yard update on a budget? See our guide to backyard ideas on a budget for low-cost ways to shape the space around the fire.
If the fire will sit on a paved area, our guide to patio design ideas can help you plan the surface and layout first.
Working with a tight yard? Our guide to small backyard ideas shows how to fit a gathering zone into limited space.
Want food and fire in the same yard? Our guide to outdoor kitchen ideas covers how to keep cooking and lounging as separate zones.
For planting around the seating ring, see our guide to modern garden design ideas for beds that soften hard surfaces.



Leave a Reply
You must be logged in to post a comment.